How to use-DTH22 Sensor
Humidity and Temperature
The DHT-22 (also named as AM2302) is a digital-output relative humidity and temperature sensor. It uses a capacitive humidity sensor and a thermistor to measure the surrounding air, and spits out a digital signal on the data pin.
In this tutorial you will learn how to use this sensor with Arduino uno. The room temperature & humidity will be printed to serial monitor.
In this tutorial you will learn how to use this sensor with Arduino uno. The room temperature & humidity will be printed to serial monitor.
 |
About the DHT-22 sensor
The DHT22 is a basic, low-cost digital temperature and humidity sensor. It uses a capacitive humidity sensor and a thermistor to measure the surrounding air, and spits out a digital signal on the data pin (no analog input pins needed).
Connections are simple, the first pin on the left to 3-5V power, the second pin to your data input pin and the right most pin to ground.
Connections are simple, the first pin on the left to 3-5V power, the second pin to your data input pin and the right most pin to ground.
Technical details:
|  |
What you will need - Hardware
For this tutorial you will need:
| 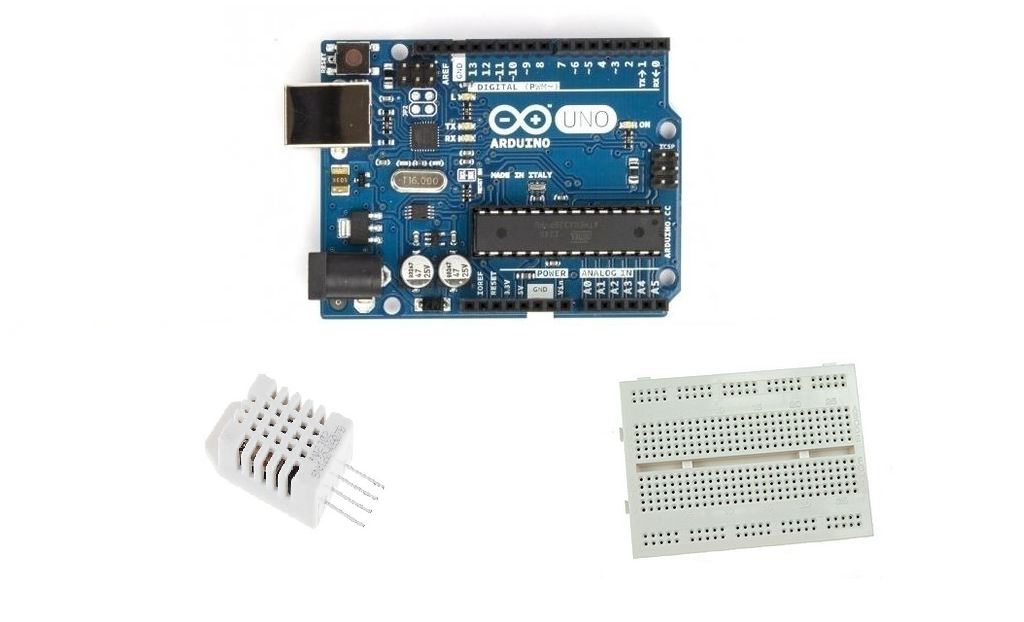 |
The Circuit
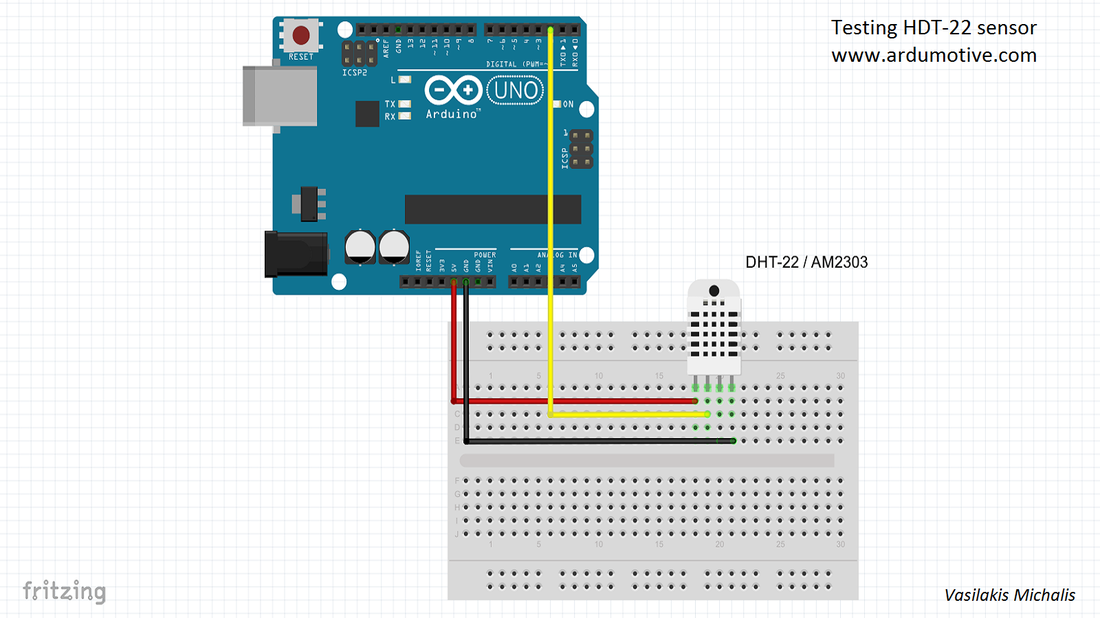
The connections are pretty easy, see the image above with breadboard circuit schematic.
The code ::

Here's the code,
*************************************************************************************
/* How to use the DHT-22 sensor with Arduino uno
Temperature and humidity sensor
*/
//Libraries
#include "dht.h";
//Constants
dht DHT;
const int dhtPin = 2; //Data pin of DHT-22 to Arduino digital pin 2
//Variables
int chk;
float hum; //Stores humidity value
float temp; //Stores temperature value
void setup()
{
Serial.begin(9600);
}
void loop()
{
chk = DHT.read22(dhtPin); //Check data pin and read values
//Read data and store it to variables hum and temp
hum = DHT.humidity;
temp= DHT.temperature;
//Print temp and humidity values to serial monitor
Serial.print("Humidity: ");
Serial.print(hum);
Serial.print(" %, Temp: ");
Serial.print(temp);
Serial.println(" Celsius");
delay(2000); //Delay 2 sec.
}
*************************************************************************************
Well done!

You have successfully completed one more Arduino "How to" tutorial and you learned how to use the DHT-22 sensor.
I hope you liked this, let me know in the comments.
I hope you liked this, let me know in the comments.
Comments
Post a Comment