Why You Shouldn't Always Use the Arduino Delay Function
Why You Shouldn't Always Use the Arduino Delay Function
=====================================================================
The very first time you used an Arduino board, you probably did something like this:
- Connected an LED to your Arduino
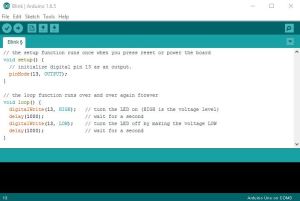
- Uploaded the default blink sketch that would turn on and off your LED every second
This is called the “Hello World” program of Arduino and shows that with just a few lines of code you can create something that has a real world application.
In the preceding example, you use the delay() function to define the intervals between the LED turning on and off.
Here’s the deal: while delay() is handy and works for basic examples, you really shouldn’t be using it in the real world… Keep reading to learn why.
How delay() Function Works
The way the Arduino delay() function works is pretty straight forward.
It accepts a single integer as an argument. This number represents the time in milliseconds the program has to wait until moving on to the next line of code.
When you do delay(1000) your Arduino stops on that line for 1 second.
delay() is a blocking function. Blocking functions prevent a program from doing anything else until that particular task has completed. If you need multiple tasks to occur at the same time, you simply cannot use delay().
If your application requires that you constantly read/save data from inputs, you should avoid using the delay() function. Luckily there is a solution.
millis() Function to the Rescue
The millis() function when called, returns the number of milliseconds that have passed since the program was first started.
Why is that useful?
Because by using some math, you can easily verify how much time has passed without blocking your code.
The sketch below shows how you can use the millis() function to create a blink project. It turns the LED light on for 1000 milliseconds, and then turns it off. But, it does it in a way that’s non-blocking.
Let’s take a closer look at a blink sketch that works without a delay function:
/*
    Blink without Delay, example here: arduino.cc/en/Tutorial/BlinkWithoutDelay
*/

// constants won't change. Used here to set a pin number :
const int ledPin =  13;      // the number of the LED pin

// Variables will change :
int ledState = LOW;             // ledState used to set the LED

// Generally, you should use "unsigned long" for variables that hold time
// The value will quickly become too large for an int to store
unsigned long previousMillis = 0;        // will store last time LED was updated

// constants won't change :
const long interval = 1000;           // interval at which to blink (milliseconds)

void setup() {
  // set the digital pin as output:
  pinMode(ledPin, OUTPUT);
}

void loop() {
  // here is where you'd put code that needs to be running all the time.

  // check to see if it's time to blink the LED; that is, if the
  // difference between the current time and last time you blinked
  // the LED is bigger than the interval at which you want to
  // blink the LED.
  unsigned long currentMillis = millis();

  if (currentMillis - previousMillis >= interval) {
    // save the last time you blinked the LED
    previousMillis = currentMillis;

    // if the LED is off turn it on and vice-versa:
    if (ledState == LOW) {
      ledState = HIGH;
    } else {
      ledState = LOW;
    }

    // set the LED with the ledState of the variable:
    digitalWrite(ledPin, ledState);
  }
}
This sketch above  works by subtracting the previous recorded time (previousMillis) from the current time (currentMillis). If the remainder is greater than the interval (in this case, 1000 milliseconds), the program updates the previousMillis variable to the current time, and either turns the LED on or off.

And because it’s a non-blocking, any code that’s located outside of that first if statement should work normally.

You can now understand that you could add other tasks to your loop() function and your code would still be blinking the LED every one second.


We’ve learned two different ways of dealing with time with the Arduino. Using the millis() functions takes a little of extra work when compared to using delay(). But your programs can’t do multitasking on the Arduino without it.

Share this post with a friend that also likes electronics!

You can contact me by leaving a comment. If you like this post probably you might like my next ones, so please support me by subscribing my blog and my Facebook Page.

Thanks for reading,

Happy Coding :)


Comments
Post a Comment